How to take progress photos you can actually compare
Most progress photos fail before you take them: a different room, a different distance, a different time of day. Fix the setup once and every photo after that compares.
Short answer
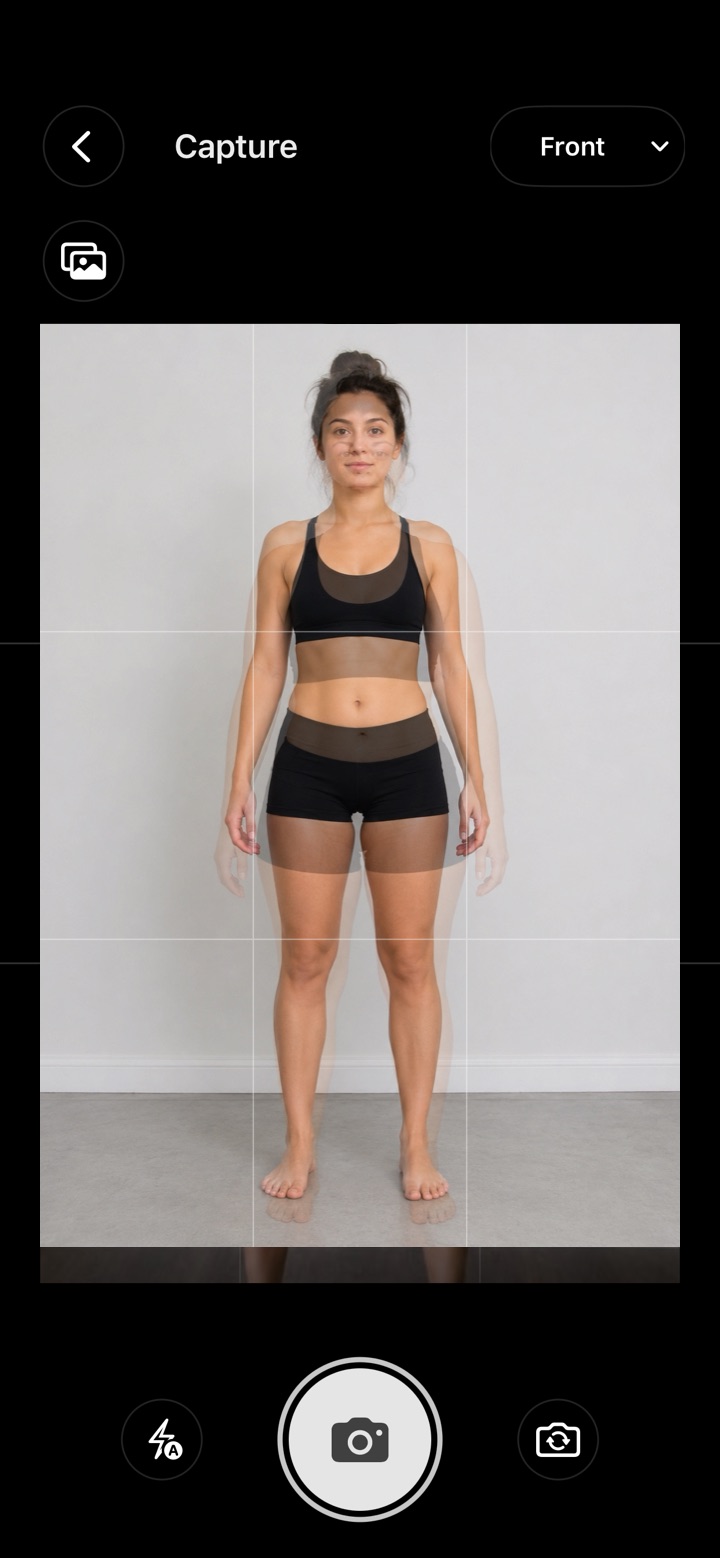
Take progress photos in the same spot, light and clothing, at the same time of day, with the camera at chest height about 2–3 m (6–10 ft) away. Shoot front, side and back relaxed, weekly, and compare photos four or more weeks apart. A ghost overlay of your last photo makes matching the framing easy.
The setup (do this once)
- Pick one spot with a plain wall and space to step back. Mark where your feet go with tape or a sticky note.
- Pick one light. Daylight from a window in front of you is best. Avoid light from directly above, which deepens shadows and exaggerates muscle, and from behind, which flattens everything.
- Fix the camera position. Chest or navel height, level (not tilted), about 2–3 m away. A shelf, tripod or a stack of books beats holding it.
- Use the main (1×) lens. Ultra-wide lenses distort the edges of the frame. Avoid the front camera if you can: it’s lower quality and tempts you to hold the phone.
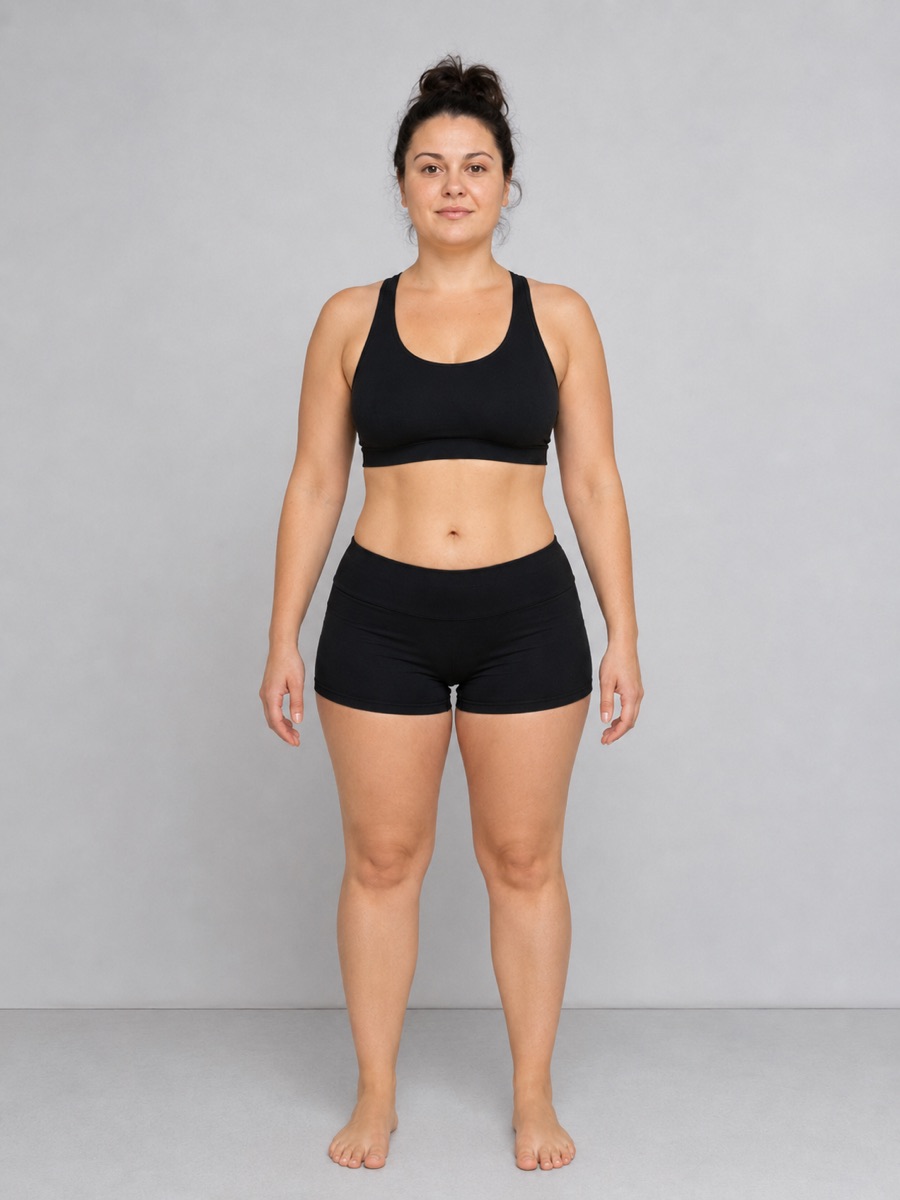
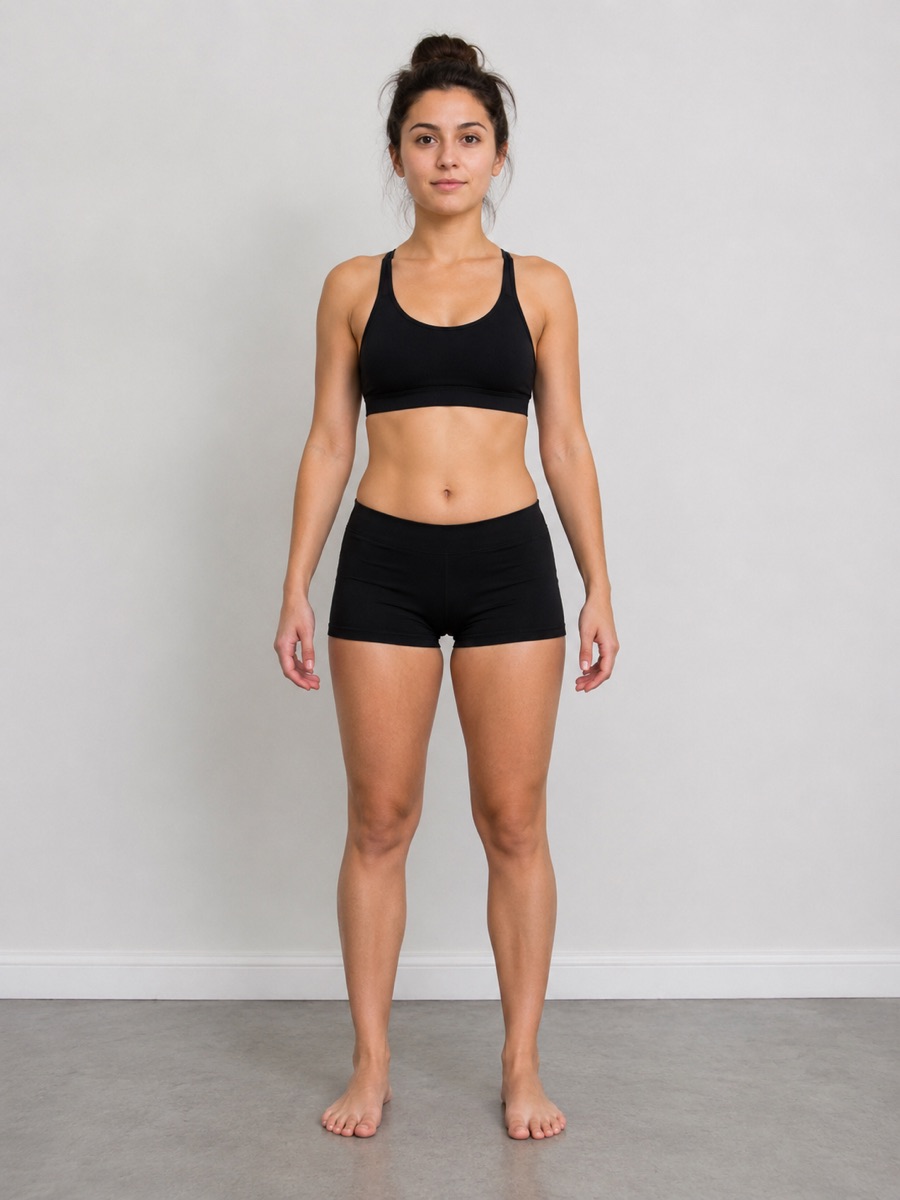
Same spot, same light, same distance: four months apart. Illustrative example photos.
The routine (every check-in)
- Same time of day. Morning, after the bathroom and before eating is the most consistent.
- Same clothing. Fitted shorts and a sports bra, or underwear. Same pair each time, so waistbands sit in the same place.
- Relaxed and neutral. Stand tall, arms slightly away from your sides, breathe out normally. Don’t suck in or flex unless it’s a dedicated flexed pose.
- Front, side and back. Three photos cover posture, waist, back and glutes. See progress photo poses.
- Match the last photo. Line up your feet, head height and outline with your previous photo. In ProgressLens it appears as a ghost overlay on the camera.
- No filters, no pump, no edits. Turn off beauty filters and portrait mode, and take photos before training.
Common mistakes
| Mistake | What it does | Fix |
|---|---|---|
| Phone held at arm’s length | Changes angle and distance every time | Shelf, tripod or timer |
| Overhead bathroom light | Makes you look leaner or more muscular one day, softer the next | Window light, same time |
| Mirror selfies | Phone hides your face and chest, angle varies | Camera on a stand facing you |
| Comparing week to week | Changes are too small to see | Compare 4–12 weeks apart |
| New clothes | Waistbands and fit change your shape | Same pair every time |
How to compare them
Put photos from the same pose side by side, at least four weeks apart. Look at the outline: waist width, the gap between your arms and torso, shoulder line, posture and belly from the side. Then check your waist measurement from the same days. Read how to compare progress photos, or use the free before and after maker.
FAQ
Frequently asked questions
What is the best time to take progress photos?
Morning, after using the bathroom and before eating or drinking. You’re at your most consistent then, with less bloating and water variation.
Should I take progress photos in a mirror?
It works, but a camera on a stand facing you is more consistent and shows your whole body without the phone in the way.
What should I wear for progress photos?
Fitted shorts and a sports bra, swimwear or underwear, the same pair every time. Loose clothing hides changes.
How far away should the camera be?
About 2–3 m (6–10 ft), far enough to fit head to feet with a little space, using the 1× lens.
Should I smile or show my face?
Up to you. Many people crop at the chin for privacy. Keep it the same each time.